View
 Zoom to Drawing
Use when you need to see the whole drawing and material as large as will fit in the 2D View window.
Zoom to Drawing
Use when you need to see the whole drawing and material as large as will fit in the 2D View window.
F5 Refresh 2D View Shortcut key for this is F5. In situations where the complete vector geometry represents a very large job and the user zooms into a small region, the shape of arcs and curves may look faceted. This is only a display issue and will not impact on the quality of toolpaths. This command will rebuilds the display information to correct the graphics being drawn on the screen so curves are drawn smoothly again.
Guide Lines ► For more details see the section on Rulers, Guidelines and Snapping at the end of the 2D Design part of this manual. Opens the Guide Lines Pop-up Menu:
Guides Visible: Toggles the visibility of Guide Lines in the 2D view.
Delete All Guides: Deletes all the Guide Lines in the 2D view.
Lock All Existing Guides: Locks the position of all the Guide Lines in the 2D view.
Unlock All Existing Guides: Allows all the locked Guide Lines in the 2D view to be moved again.
Draw Origin: XYZ origin arrows can be toggled on and off in the 3D View to show exactly where the X0, Y0 and Z0 origin is position is relative to the material.
Draw Modeling Plane: This option controls the display of the semi-transparent 'modeling plane' which shows the position of the working model base plane.
Draw Material Block: Toggles the drawing of a wireframe representation of the limits of the material block. This is useful for seeing how the 3D model will be positioned in the block of material it is being cut from.
= Multi Sided View: Allows you to view both sides in the 2D and 3D view when working in a multi sided environment.
Color Shaded View: Draws / Undraws the color shaded job in the 3D window.
Use Shaded Background: Shows either the default gradient filled color background or a solid light blue color background. The solid color is very useful for saving images that need to be cropped out of the background in a graphics software package.
Light follows viewer: The default light setting for the 3D window shines a light onto the job from the top left corner of the material bounding box. Checking ✓ this option can sometimes be used to help visualize the job more easily.
Use Shadow Shading: Toggles the drawing of increased shadows in the 3D view. This can be useful for emphasizing details in models. This degree of shading can be increased or decreased using CTRL+NumPad+ or CTRL+ NumPad-

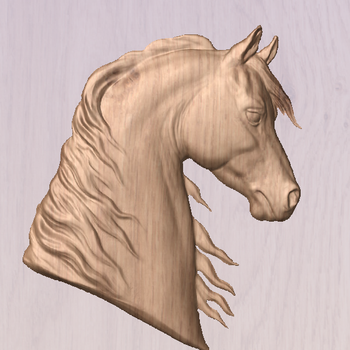
Without Shadow Shading
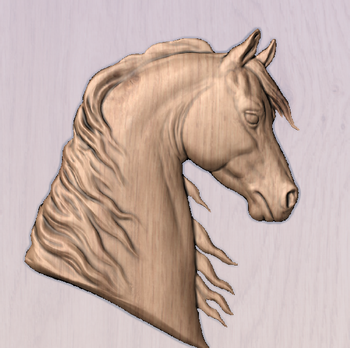
With Shadow Shading
Save Shaded Image: Saves a color shaded image of the 3D view as a BMP, JPG, PNG or GIF file.
Page
DownTile Windows Horizontal:
Tiles the 2D and 3D View Horizontally, 2D View at the top and 3D at the bottom.
Page
UpTile Windows Vertical:
Tiles the 2D and 3D View Vertically, 2D View on the left and 3D on the right.
Cascade Windows
Cascades the 2D and 3D View so they overlap.
To Maximise the windows again, double-click the title-bar of either view.