Keyhole Toolpath
This gadget simplifies the process of creating 'keyhole' toolpaths which are cut into the back of a sign or plaque to allow easy hanging on a wall. These slots are cut using a 'keyhole' cutter as shown on the left. The toolpath for these slots needs to plunge into the material at the mounting screw entry point to a depth that will ensure that the wide part of the cutter is below the material surface. The tool then moves along the 'slot', once it reaches the end of the slot, the tool retraces its path back along the slot to retract at the original plunge point.
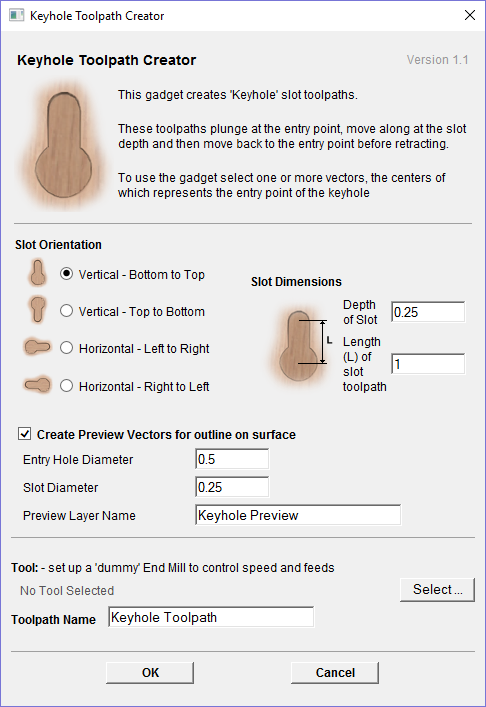
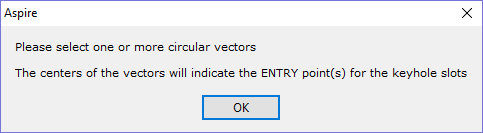
Like all Vectric Gadgets, the top of the form gives brief instructions on how it should be used. For this gadget, you need to select one or more circular vectors in your design to indicate where you want the entry points for the keyhole slots to be before the Gadget is run. If you start the gadget without selecting one or more vectors to indicate these positions, the following warning will be displayed:
Once the form is displayed you can enter the parameters for your keyhole toolpath.
The data to be entered falls into three separate categories.
Slot Parameters
In this section of the form you specify the direction the slots will be machined and also the depth and the length for the slots.
Preview Drawing
To help with visualisation of the slot, the gadget can draw a vector outline of how the slot will appear on the surface of your job. This drawing is optional and if you un-check the Create Preview Vectors for outline on surface check box you do not need to fill in the parameters in this section. If you do want previews drawn, you can specify the entry hole diameter which will be created by your keyhole cutter and also the diameter of the slot the tool will create on the surface. You can also specify the name of the layer the vectors will be created on.
Toolpath Parameters
The final section of the form is used to specify a tool which the feed and plunge rates are picked up from, and also a name for the toolpath which will be created. As keyhole cutters are not supported natively by the program, just set up an end-mill with the required feed rates to use.
After entering all your parameters and pressing , the gadget will create a toolpath within the program to machine your slots and also the vector preview if you enabled this option. The screen shot below shows the preview vectors in the 2D view along with the toolpath in the 3D view.