Celtic Weave Creator
This Gadget dramatically simplifies the creation of complex 3D Celtic weave patterns using an interactive interface to produce all the vectors required by the Extrude and Weave tool.
 Using the Gadget to create the 2D Artwork
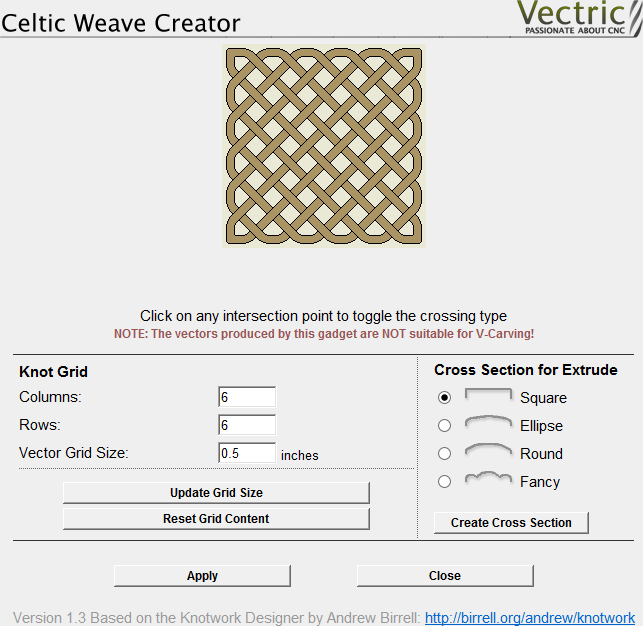
Knot Grid
Simply define the size of the weave grid you require. Click to see your changes reflected in the Weave Preview Image.
Weave Preview Image
Click on the interactive weave image to cycle through the different crossing options at each intersection point. The 3 options are:
- Cut Vertical
- Cut Horizontal
- Cut Neither
You can reset the Weave Preview Image at any time using the button.
Cross Sections for Extrude
When you are happy with the layout of the weave pattern, choose which cross-section you would like and click to add it to your 2D View.
Click the button to convert the weave design you have created into vectors artwork in the 2D View. You can change the Weave Preview Image and click to update this artwork as often as you like.
Click once you are happy with your design. The Celtic Weave Creator form will close, but if you re-select the unedited weave pattern in the 2D View and re-open the Celtic Weave Creator gadget it will reflect you currently selected weave in the Weave Preview Image for further editing.
Creating the 3D Weave from the 2D Artwork
To complete the weave process, open the Extrude and Weave tool on the modeling tab. Select the main weave pattern vectors (but not the cross-section vector) and click on the button in the Drive Rails section at the top of the form. Now select the cross section vector and click anywhere on the weave rails vectors in the 2D View to apply the cross-section shape to it. Click to create the weave.
There are many more options available to use the weave vectors created by this Gadget. For a full description, please see the section on the Extrude and Weave tool.